Authorization
Authorization
A third party application can only access data of an installation after the farmer has given its permission. If the farmer gives permission your application will receive a token that will allow it to authenticate to the Nedap Livestock Connect API. Each time you make an API call you need to present this token as a proof of permission.
For this authorization and authentication process, we make use of the standard OAuth2 authorization protocol. More information about the OAuth2 authorization protocol can be found here.
This movie presents a quick guide to get started in authorizing with the API. It contains the same information as presented on the rest of this page.
Implementing
OAuth2 protocol
To set up a scalable infrastructure that can handle the authorization process you need to implement the OAuth2 protocol in your application. The OAuth2 protocol requires you to build a link in your web application that can redirect the farmer to the Nedap Business Insight page where he/she can safely login and grant permission to your application to access their Nedap Livestock solution. Once built, the OAuth2 protocol is a safe scalable solution that makes your Nedap connection available to all farmers who are using your application and a Nedap solution in an easy way.
OAuth2 flow summarized:
Step 1: Your application redirects the farmer to the Nedap Business Insight dialog.
Step 2: The farmer can log in with his Business Insight credentials and can authorize your application.
Step 3: The farmer is redirected to your application and includes a temporary authorization token.
Step 4: You retrieve the permanent access token from the API using this authorization token.
Step 1: Construct an URL to Nedap Business Insight and redirect the Farmer to it
Initialize the authorization process by redirecting the farmer from your own application to the Nedap Business Insight dialog.
Firstly you must construct an URL. This URL should direct to https://nedap-bi.com/oauth/authorize . In the URL parameters, you should pass your own Client ID (which you have received from Nedap after filling in the contact form on this webpage), and a callback URL, which you host from within your own organisation.
Note that Nedap must whitelist your callback URL. While testing and developing, the callback URL ‘urn:ietf:wg:oauth:2.0:oob’ can be used and is whitelisted by default.
Code example:
To determine which permissions you want to ask the farmer, you specify scopes in the URL.
You will want to request more permissions than the default one. The default scope is 'account'. If you want to request multiple scopes, these can be separated by spaces. An overview of all scopes can be found in the list of API calls
A code example that provides more scopes:
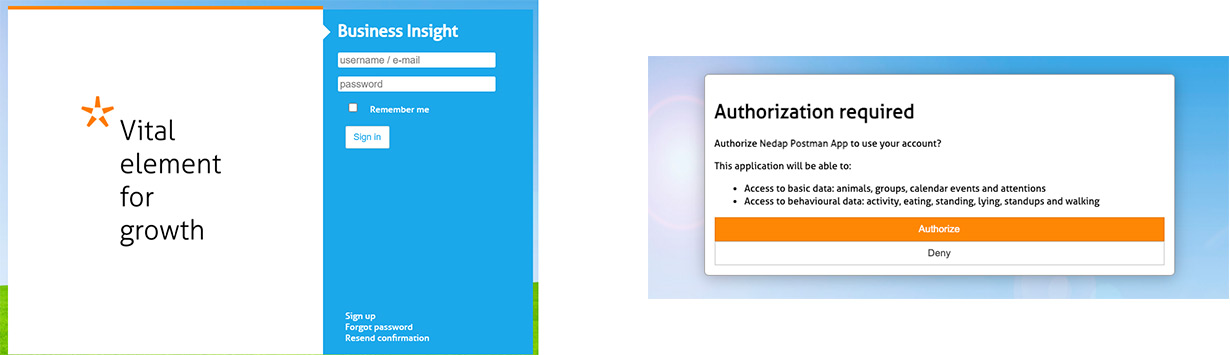
From your own software, you must then redirect the farmer to the constructed URL. This can be done for example by offering a button in your software, with a text similar to ‘Link Nedap data’. This will navigate the farmer to the URL, which presents a login screen for Nedap Business Insight, where they can login with their account and authorize your software application
Step 2: Farmer authorizes your application
After the farmer is redirected to the Nedap Business Insight login page, they can authorize your application. In case there are multiple installations linked to their account, they must chose a specific one.
Farmers will have received their own Nedap Business Insight account when they became a new customer at Nedap.
In addition to a Business Insights account, the installation at the farm must also be linked to Business Insight. In almost all cases, this is already in place. For instructions on how to complete that process, check the Get farmers’ permission page. This is typically done by dealers of Nedap products.
Step 3: Farmer is redirected to your application and provides you an authorization token
When the farmer authorizes your application, their browser is redirected to your callback URL (which you placed in the URL of step 1). If the user authorized your application, the redirection URL contains an additional parameter: an authentication code. Your software should capture this code for the last step in this process.
For the code example above, a successful authorization process will result in calling the following URL:
Successful redirection:
Step 4: Retrieve access token
With the received authorization code, you can request an access token from the authorization server using a POST API call to https://nedap-bi.com/oauth/token . In the request body, you have to include your:
- Client ID (which you received from Nedap)
- Client secret (which you received from Nedap)
- The same callback URL as in step 1
- The received authorization code from step 3.
- An argument ‘grant_type’ with value ‘authorization_code’
Note that the POST token API call must be done within a minute, or the code expires.
Code Example:
-d 'client_secret=b0147b284a' \
-d 'redirect_uri=https://my_application.com/access_code' \
-d 'code=aecd3e40cd' \
-d 'grant_type=authorization_code' \
https://nedap-bi.com/oauth/token
If everything went ok, the authorization server returns an access token and a refresh token. For example:
Successful authorization response:
"access_token": "14f47b4ceb",
"token_type": "bearer",
"expires_in": 6464,
"refresh_token": "dfea2eccfd",
"scope": "account"
}
With this access token you can access the data of the farm by adding the following header to the API calls:
Authorization header:
Revoke token
If you ever wish to revoke a token, this can be done with the following call:
-F client_secret=0d74dkfi3 \
-F token=aecd3e40cd \
-X POST https://nedap-bi.com/oauth/revoke
Refresh token
The above process provides you with the access token necessary to communicate with the Nedap API. However, it is only valid for 24 hours, and needs to be refreshed after that. It is not necessary to go through all the above steps again after this, The refresh token can be used for this purpose. Therefore, it is advised to store both the token and refresh token in your software. Refer to Authentication for more information.
One token per farm
Please note that the token you obtain through this process is valid for one specific farm: the one specified in step step 2. More information on how to connect to multiple farms can be found in the frequently asked questions